
How to Promote Your Business Using Facebook
Facebook is the top social media platform used by businesses today, with over 2.5 billion active users. Whether you are a large corporation or a small business, Facebook offers a massive reach for promoting your brand. The best part? You can start promoting your business without a hefty budget. You can take advantage of free tools like Facebook Messenger and comments or run paid ads to increase visibility and engagement.
In this article, we'll guide you through how to effectively use Facebook to promote your business, from setting up a Facebook Business Page to launching your first Facebook Ad campaign.
What is Facebook for Business?
Facebook offers an extensive platform for businesses to engage with customers, drive sales, and build brand awareness. The Facebook for Business site provides tools and guides to help businesses get started with their Facebook presence. You’ll find interactive quizzes, personalized ad plans, and video lessons that cover essential skills such as:
-
Creating a Facebook Business Page
-
Sharing content and building communities
-
Setting up appointments and creating offers
How to Set Up a Facebook Business Page (Step-by-Step)
Creating a Facebook Business Page is a key first step to getting discovered online and connecting with potential customers. Let’s walk you through the process step-by-step, with tips on how to optimize it for growth—especially if you're using Wazzn to connect your page with WhatsApp.
1) Log into your personal Facebook account
An existing personal Facebook account is required to create a Facebook Business Page. But don’t worry—your personal information will never be shown publicly on your business page.
You’ll only use the account to manage your page. Your name, photos, and personal activity stay completely private.
2) Create your page
Go to facebook.com/pages/create to start.
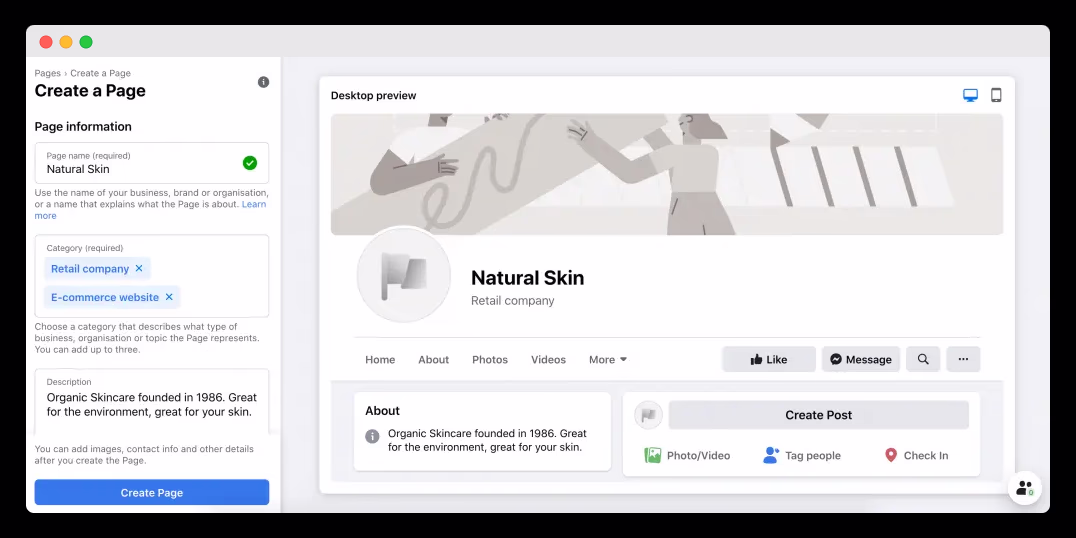
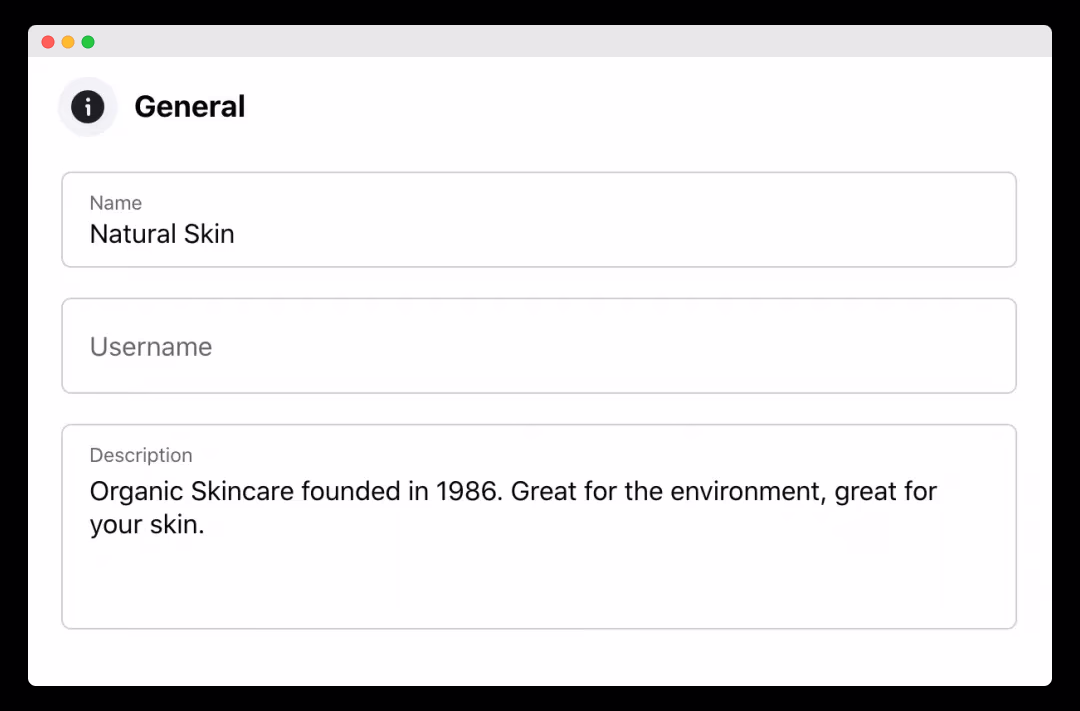
Fill in your page details using your key business information. Use your brand name or a name that your customers are likely to search for. This improves discoverability and helps you show up in search results.
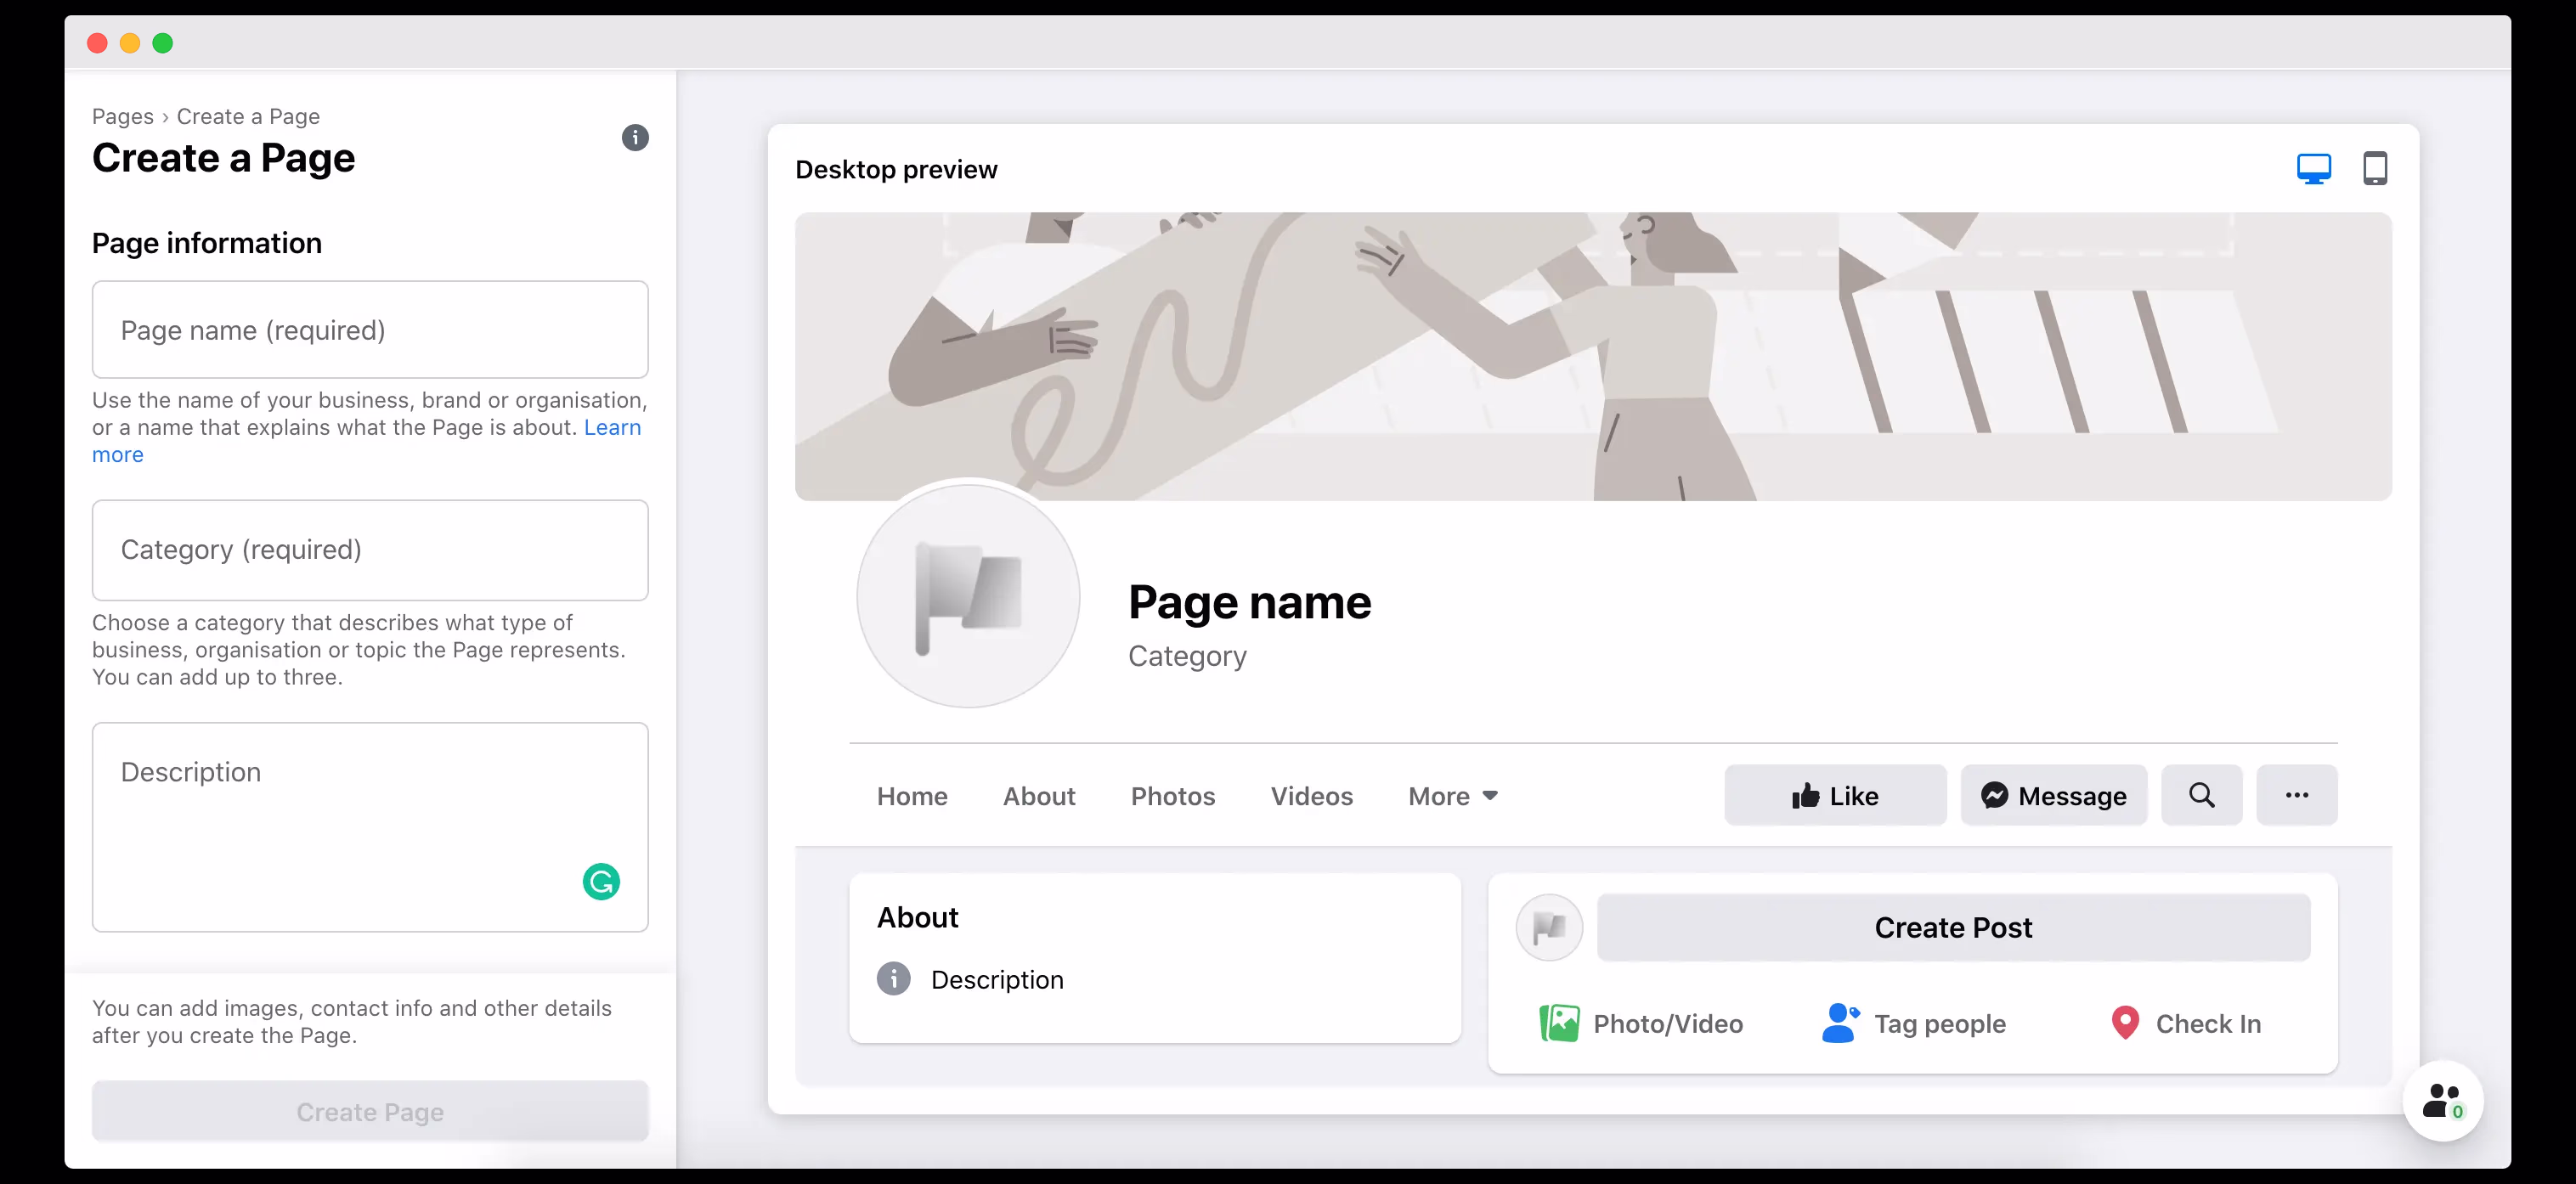
Choose a business category
Type in a word or two that best describes your business. Facebook will suggest category options—choose up to three that fit your brand.
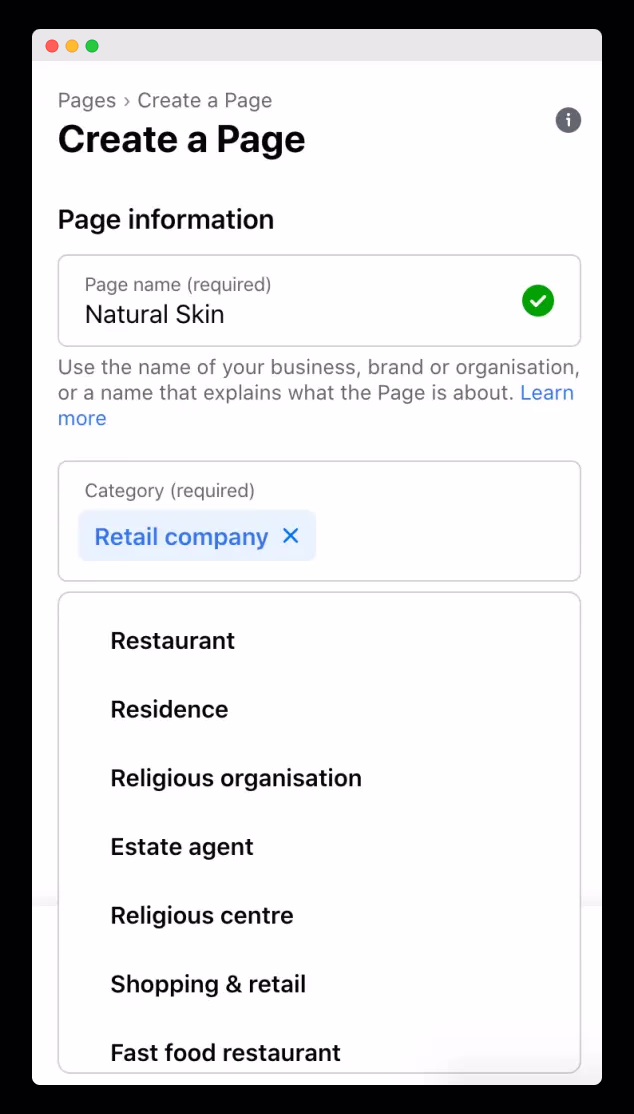
Think like a customer:
What would someone type in if they were searching for your product or service?
💡 Note: Only the first category will appear publicly under your page name.
Add a short description
This is your elevator pitch. Use this space to quickly tell people what your business is about and what makes it unique.
✨ Tip from Wazzn: Include a call to action like “Message us on WhatsApp for inquiries!” and link it later with Wazzn’s automation.
3) Add images
Visuals make the first impression—so choose your images wisely.
Upload a profile photo
Use a logo or an image that’s instantly recognizable. This image appears next to your page name in search results, comments, and posts. Avoid placing important design elements in the corners—they might get cropped in the circular display.
Well-known brands use their logos, while small businesses might choose a photo of their store or best-selling product.
Upload a cover photo
This is the largest image on your page—it spans across the top and grabs attention.
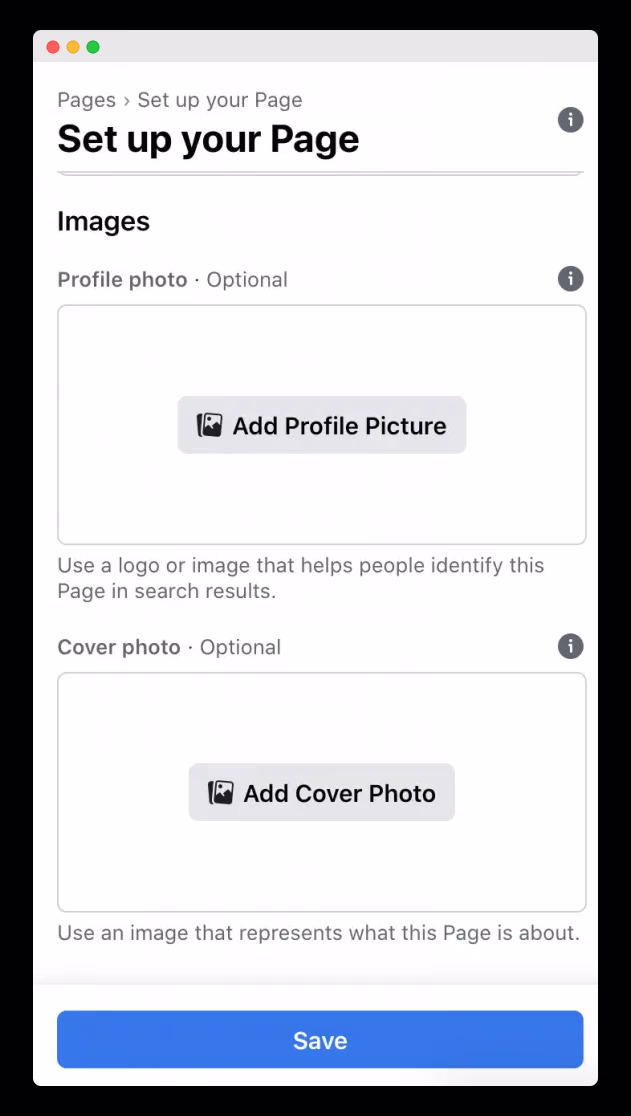
Use this space to showcase your product, team, location, or a special offer. Keep it on-brand, high-quality, and optimized for both desktop and mobile.
Bonus tip: If you're using Wazzn, consider adding a WhatsApp CTA to your cover photo—like “Chat with us instantly on WhatsApp!” Then connect it with Wazzn’s messaging flow.
4) Edit Page Info
Click on “Edit Page Info” in the left-hand menu to fine-tune the details of your business.
Create a username
Your username (also known as your handle) makes your page easier to find. It appears like @yourbusinessname and can be up to 50 characters long.
Make it memorable, simple, and aligned with your brand name.
Add contact information
Help customers reach you by adding:
-
Phone number
-
Email address
-
Website
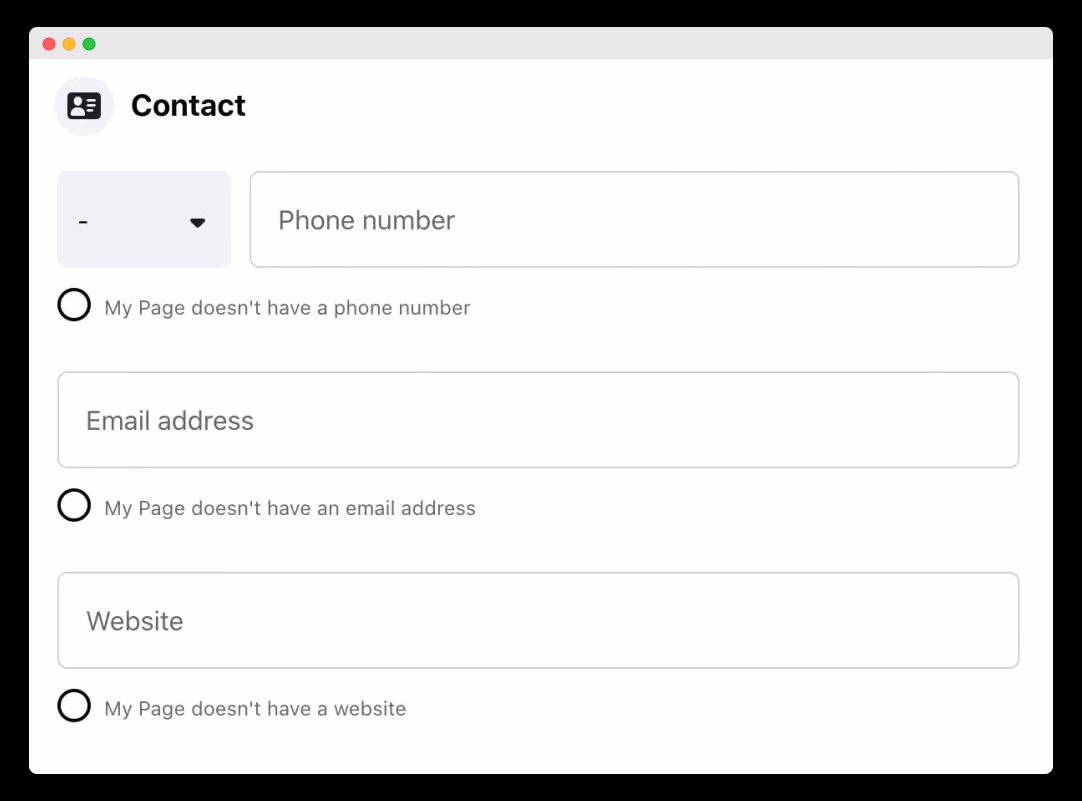
If you’re using Wazzn, make sure to include your WhatsApp Business number—so customers can message you directly and receive an automated welcome flow or response.
Set your location
Even if you're an online-only business, it’s a good idea to provide a general location or city. This adds credibility and makes your page more trustworthy.
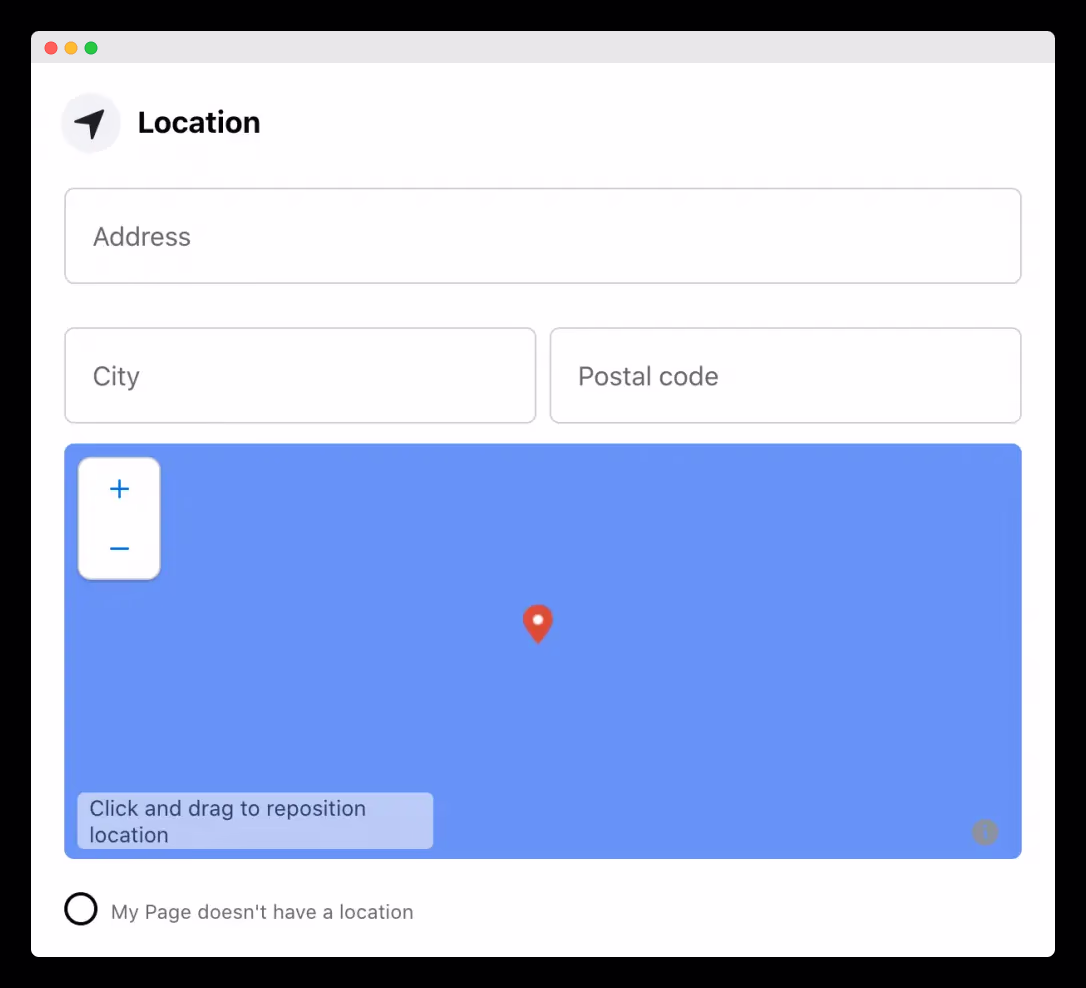
For physical stores, adding your address also enables Facebook’s map feature, making it easier for people to visit.
Add your business hours
Let customers know when you’re open or when they can expect a reply. This helps manage expectations and improves your customer experience.

With Wazzn, you can even create auto-replies outside business hours, so people still feel acknowledged even when you’re away.
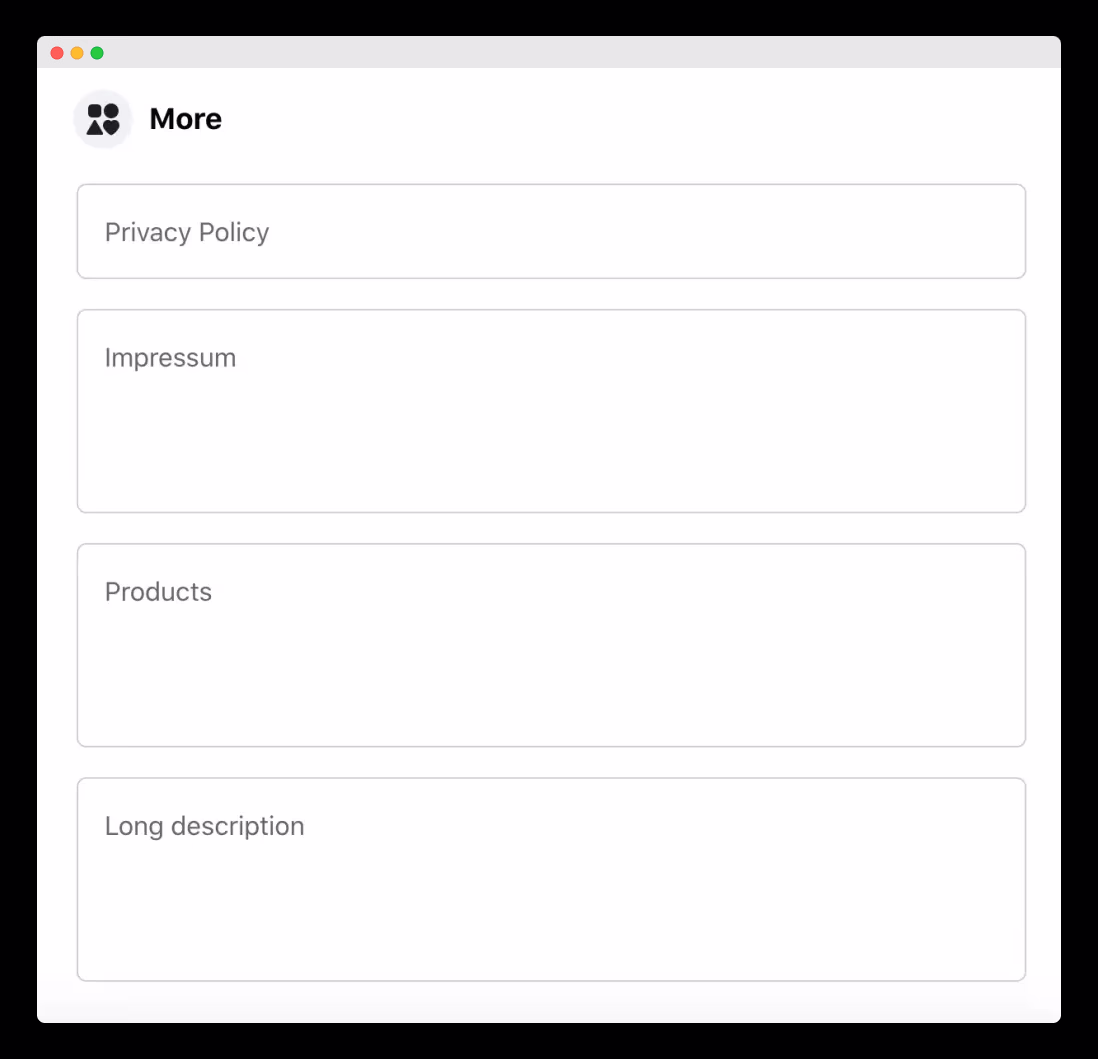
Add more business details
Depending on your location, you can also include:
-
Impressum (for European countries)
-
Price range
-
Privacy policy
Once you’ve filled out all the details, your Facebook Business Page is ready to go live!
Now, you can:
-
Invite friends to follow your page
-
Start sharing updates and content
-
Launch your first Facebook Ad
-
Connect your Facebook Page to Wazzn and automate customer conversations on WhatsApp
With just a few clicks, your business will be set up to engage leads, drive conversions, and offer seamless support—all from Facebook.
What’s the difference between a personal Facebook account and a Business Page?
In simple terms, a Facebook Business Page is designed to represent a business and promote its products or services. A personal profile, on the other hand, is meant for individual use—sharing life updates, connecting with friends and family, and posting photos or videos.
| Feature | Facebook Business Page | Facebook User Profile |
|---|---|---|
| Tabs under profile photo | Home, Jobs, Events, Reviews | Timeline, About, Friends, Photos, Videos |
| Info modules on page | About, Photos, Videos, Page Transparency | Intro, Photos, Friends |
| Add Friend button | Not available | Available |
| Like button | Available | Not available |
What is Facebook Business Manager?
Facebook Business Manager is your central hub for managing everything related to your business on Facebook. It brings together your Facebook Page, Ads Manager, team members, and more—all in one place. Once you connect your Facebook

Business Page and Ad Account inside Business Manager, you can:
-
Monitor performance and billing
-
Manage events
-
Set up product catalogs
-
Share access with your team, partners, or agencies
Now let’s walk through some of the key features.
1) Add your team
Go to the Users tab in Business Manager, then invite your teammates using their email addresses. You’ll have two options:
-
Employee access: Limits access to specific tools and accounts.
-
Admin access: Full control, including the ability to add/remove users and change settings.
This makes it easy to collaborate securely—especially if you’re working with an agency or external partners.
2) Set up your Facebook Pixel
The Facebook Pixel is a small piece of code you add to your website. It helps you track how people interact with your site after clicking on your ads.
To set it up, go to Events Manager in Business Manager and select Pixels. From there, you can create a new pixel and add it to your website or integrate it via tools like Wazzn.
The Pixel allows you to:
-
Retarget users who visited your site
-
Measure actions like purchases or form submissions
-
Optimize your ads for better results
3) Create custom audiences
With Business Manager, you can create three types of audiences:
-
Custom Audiences: Based on people who’ve visited your site or engaged with your Facebook page.
-
Lookalike Audiences: Reach new people similar to your existing customers.
-
Saved Audiences: Build your own audience using demographics, interests, and behaviors.
Wazzn helps you organize customer data so you can plug in your audience lists with ease and precision.
4) Build your product catalog
Head to Assets > Product Catalogs in Business Manager. Click Create Catalog, give it a name, and choose your type (e.g., products). You’ll then upload a feed with product info like name, price, and images.
If you’re using platforms like Shopify or BigCommerce, they often have plugins to speed this up. And if you’re using Wazzn to manage your customer data, the process becomes even smoother.
5) Monitor your account health
Click on Account Quality under “Manage Business” to review your ad account and pages.
-
Keep track of any rejected ads or issues
-
Monitor restrictions placed on your page
-
Stay in good standing with Facebook to avoid interruptions
Running Your First Facebook Ad Campaign
It’s normal to feel a bit overwhelmed at first—there are so many settings and ad types. But we’ll guide you step-by-step to get your first ad up and running.
1) Choose your campaign objective
Go to Facebook Ads Manager and click Create.
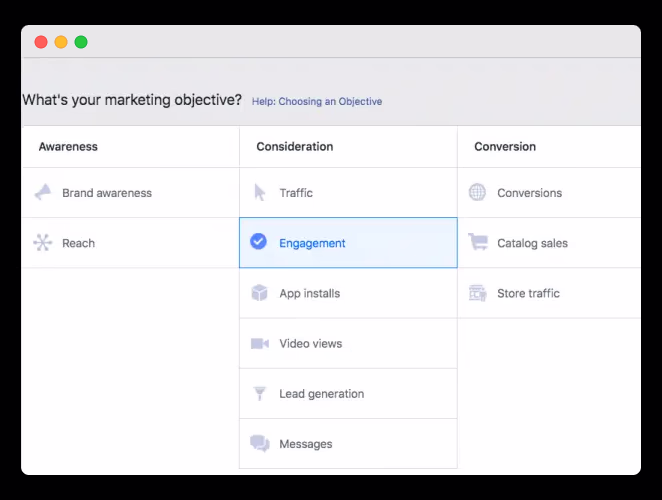
You’ll see 11 objectives to choose from—pick the one that matches your goal (traffic, engagement, conversions, etc.).
💡 Tip: For beginners, Engagement is a great place to start.
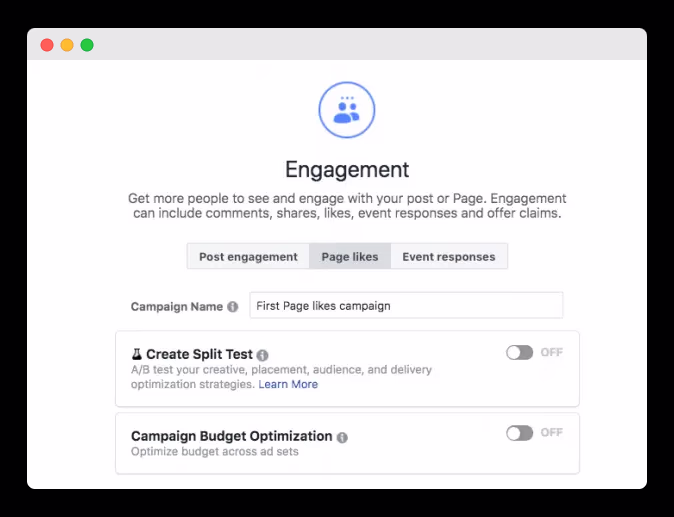
2) Name your campaign
Give your campaign a name. If you're testing multiple ad versions, you can turn on A/B Testing. You can also enable Campaign Budget Optimization so Facebook shifts budget toward better-performing ad sets.
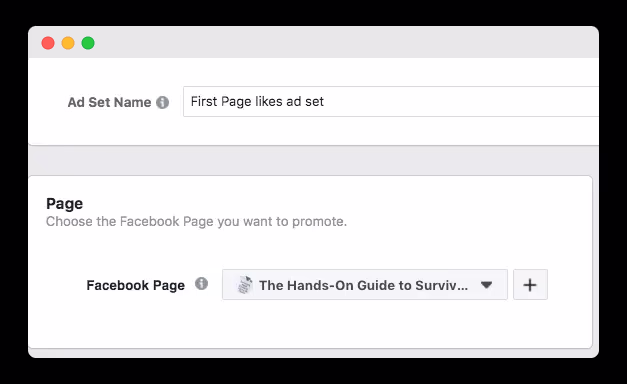
3) Target your audience
Start by giving a name to your ad set and choosing a Page to promote.
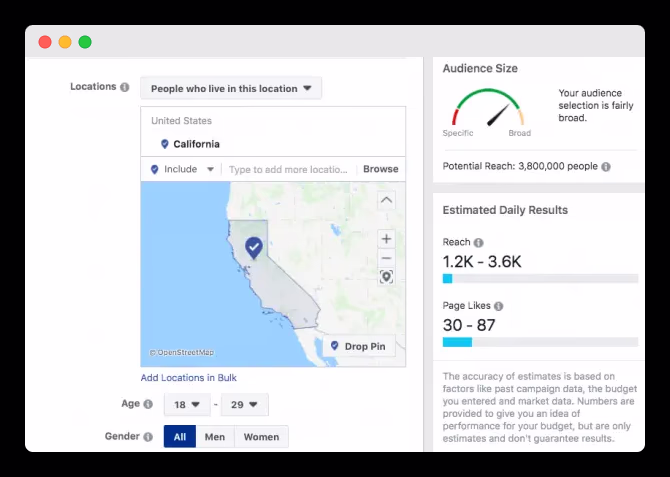
Then, create a target audience for your ads. Choose from a saved audience, custom audience, or create one right away by choosing various interests, behaviors.
Next, choose a target location, set your target audience’s age, gender, and language to narrow down the audience pool. The audience size indicator on the right provides you with a gauge of your potential ad reach. Along with that, the estimated daily results also show the potential results with your stated budget.
Keep in mind that these are estimates. It is not guaranteed that the more campaigns you run, the more accurate the estimates will be.
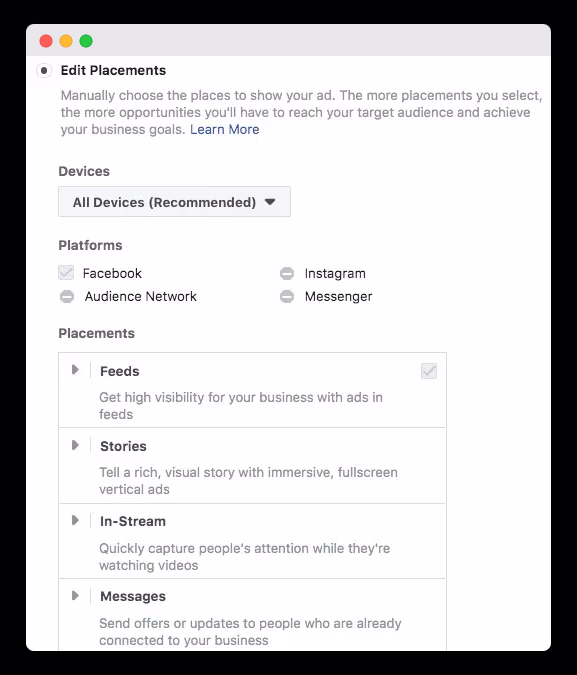
4) Choose placements
Let Facebook decide with Automatic Placements or take control by selecting Edit Placements to choose where your ads appear (Facebook, Instagram, Messenger, etc.).
5) Set your budget and schedule
Choose between:
-
Daily Budget: Spend a set amount each day
-
Lifetime Budget: Spend a total amount over a fixed time
You can also schedule when your ads run, and even choose to only show them at certain hours.
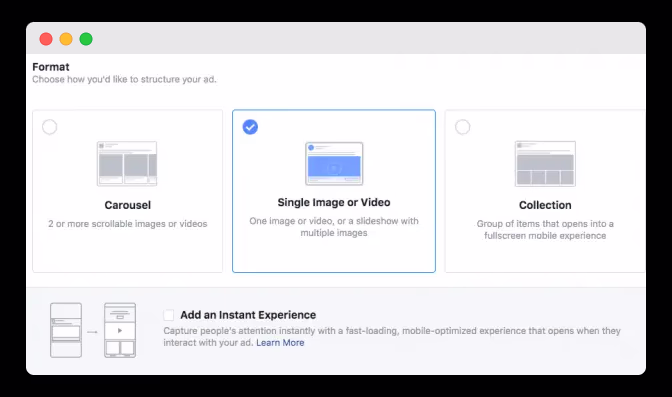
6) Create your ad
Pick your ad format and upload the creative:
-
Image
-
Video
-
Carousel
-
Collection
-
Instant Experience
-
And more
Use the preview tool to check how it looks across placements. Once you’re happy, hit Publish. Facebook will review the ad (usually takes 1–7 days), then launch it.
Bonus: Boost engagement with Wazzn’s Auto-Reply for Comments
Want to increase engagement without spending more?
Wazzn lets you automatically reply to comments on your Facebook posts. Just define keywords like “love,” “awesome,” or “interested”—and Wazzn will instantly send a personalized reply or promo message.
📣 For example: If someone comments “Nice offer!” Wazzn can automatically send them a special discount or link to buy.
This boosts interaction, builds trust, and helps convert followers into customers—without you lifting a finger.
Plus, Wazzn’s smart CRM tools can capture leads from these interactions and organize them into segmented audiences for future campaigns.